Bringing in work from ZBrush and Maya into VR and Unreal
Environment Design in Unreal
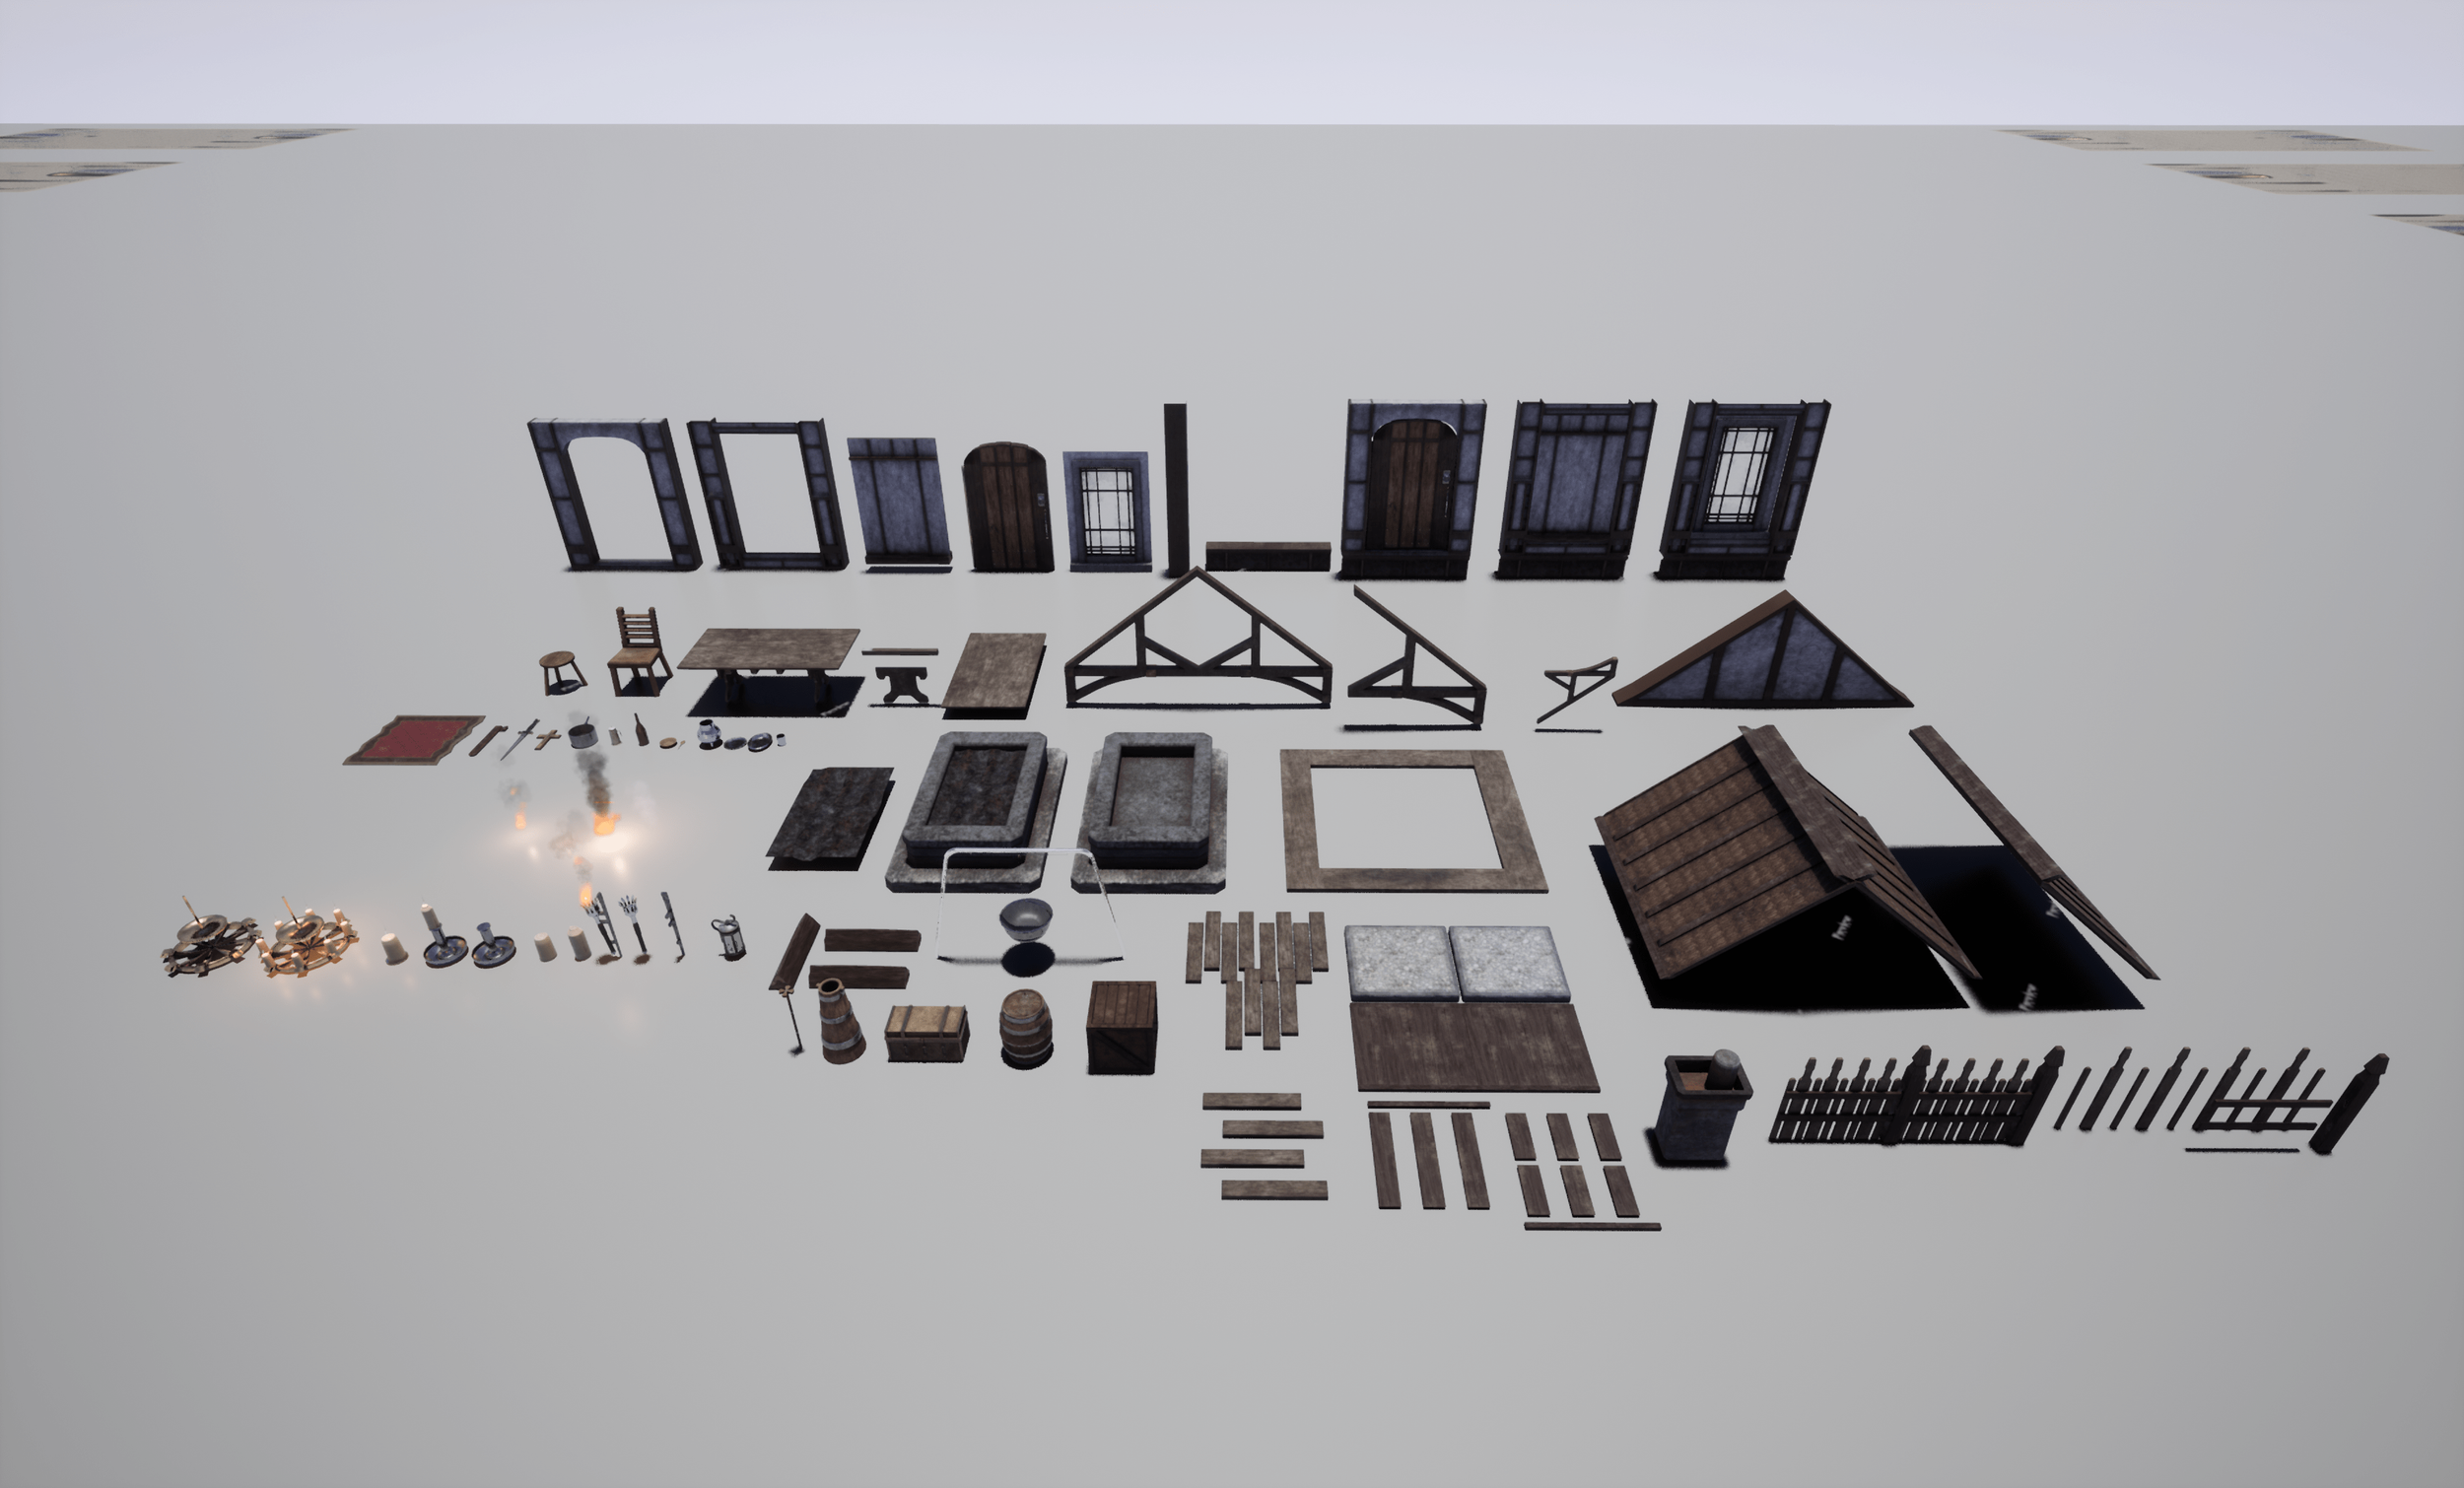
Throughout my college course, we were tasked with developing a modular environment that can be transformed into a scene of our choice. This would be the first large scale 3D model project I have ever done, not to mention my first experience with the Unreal Engine.
The project was able to work within Autodesk Maya to Substance Painter and to compiling the project in Unreal Engine, finishing in creating a whole pack of modular assets for the Tudor House scene.

Work with Velvet Flare
Additionally afterwards, I worked in an internship helping Velvet Flare create simple prop objects based on directed designs, and worked in aid of other projects too!
For the leftmost design, I worked on a VR project that was a recreated homage demo of the Atari game Adventure. I created, modeled, and rigged a rendition of the dragon present within the game so it can chase the player.
For the rightmost group of designs, the collaborative project created an original concept of a game called Fishstuck where the player can grab steampunk esque fish at the bottom of the ocean to use the mechanical fish to craft weapons in order to beat the shark circling the player.
3D Models for Low Poly
I was able to act as the creative and art director for two VR collaborative projects within a short amount of time. These two developing projects called me to additionally create 3D models for some creature models for OpenVR projects in Unity. Both of these projects allowed me to also enjoy intently creating low-poly retro esque designs within Blender.
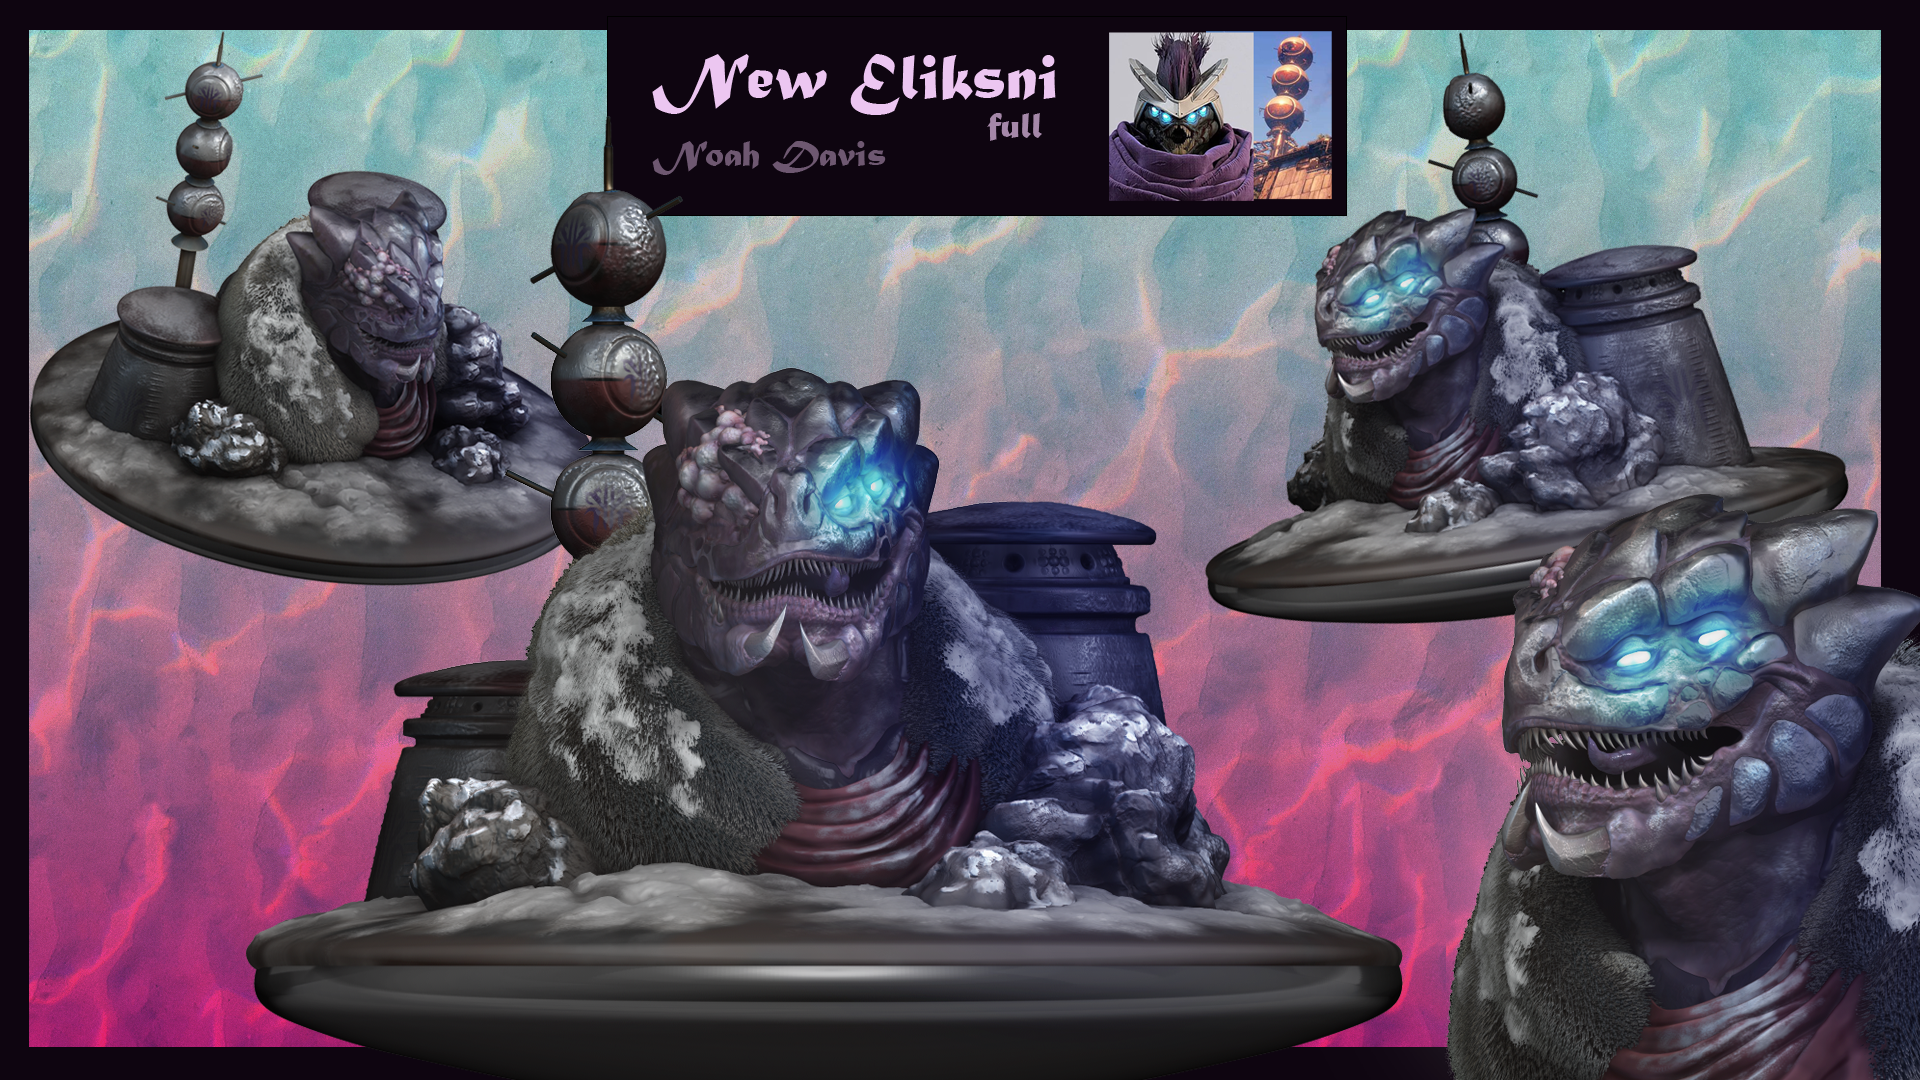
Eliksni Sculpt
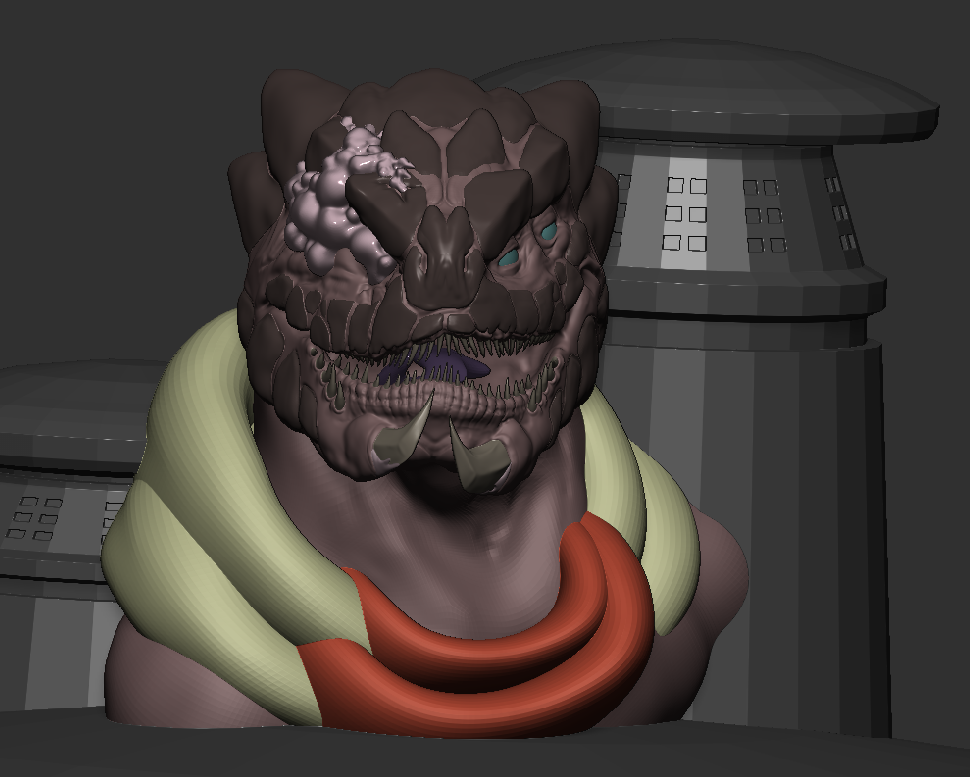
One of my recent 3D sculptures, the task was to create any design we felt like. With my interest in strange worlds and making remixed designs, I tried my hand at creating a unique character design for the Eliksni race from Bungie’s Destiny.
Unlike my other Zbrush sculpt, I planned this one with a 2D sketch to shape my design, as well as planning for the feeling the depth of the model. This project allowed me to improve the skills in Zbrush that I gained from my earlier sculpts (below) and learn new technical practices in Zbrush.


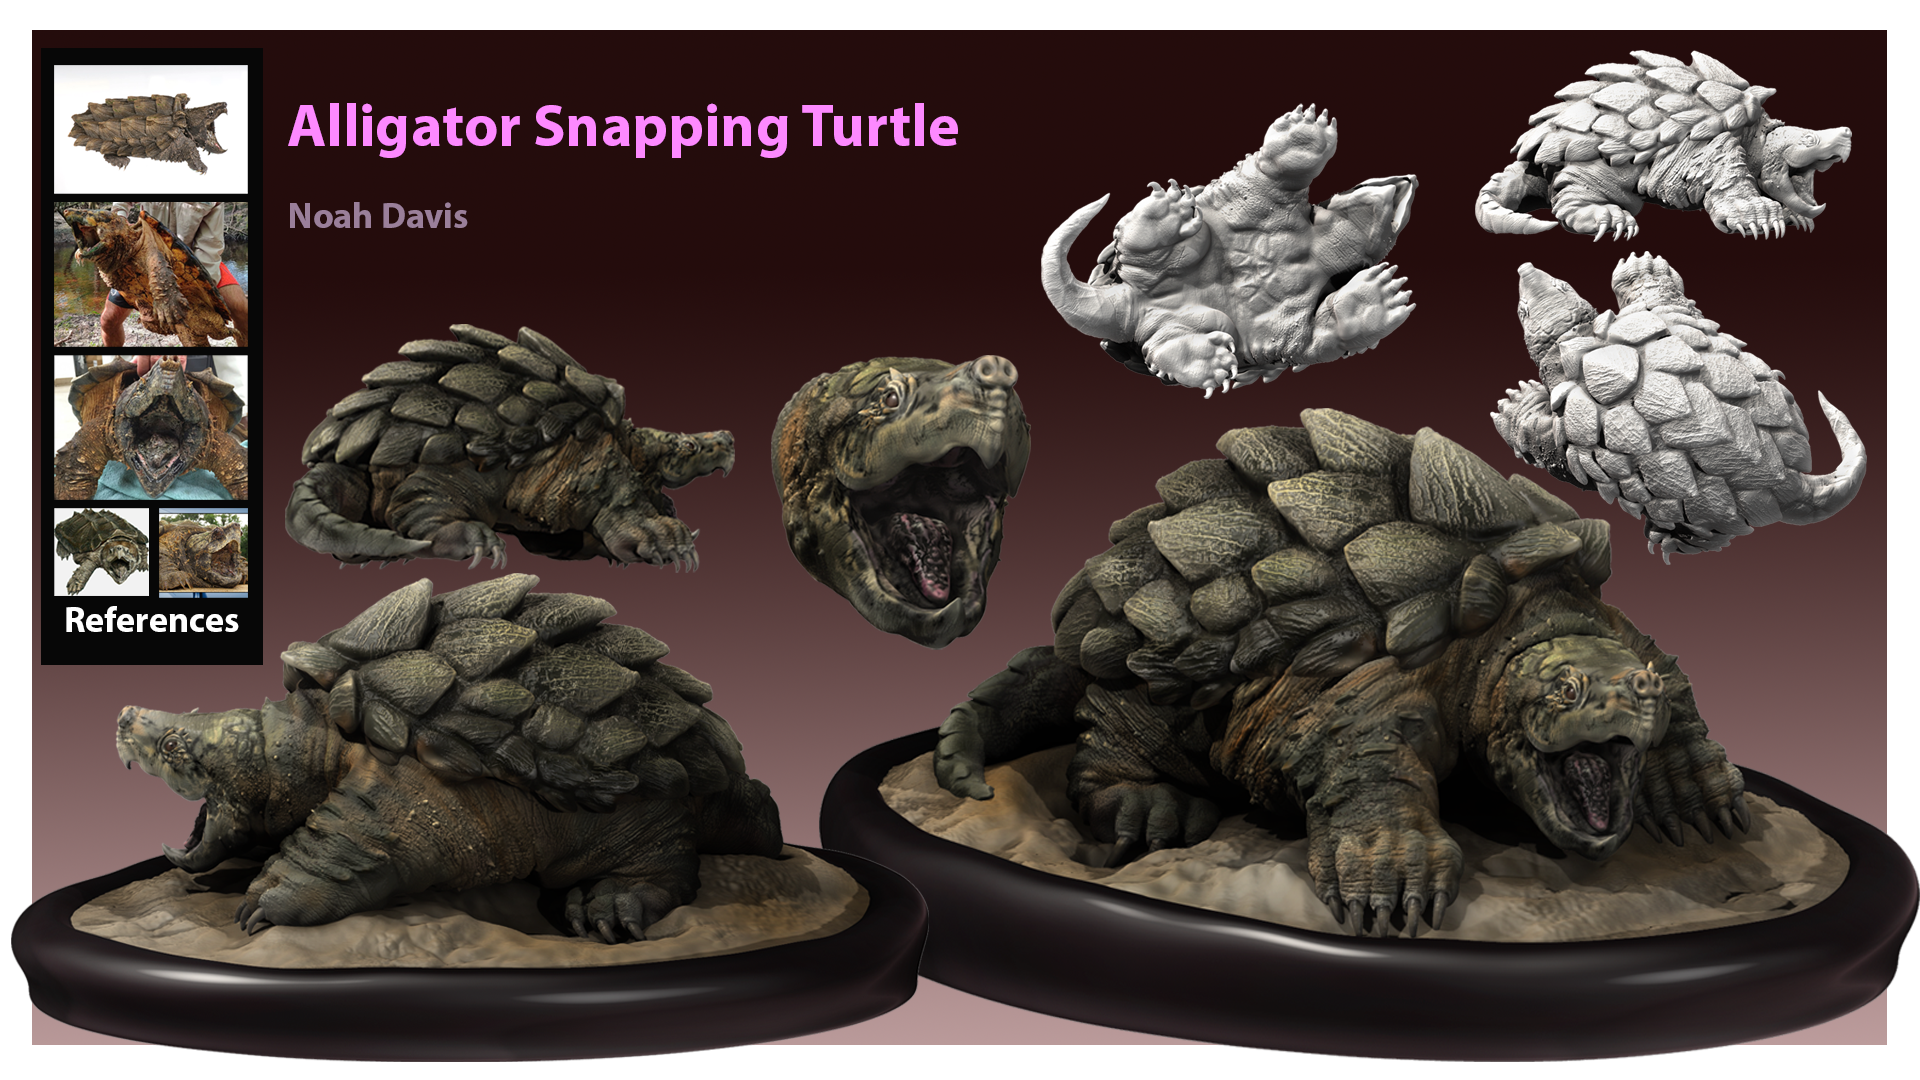


Animal Sculpt
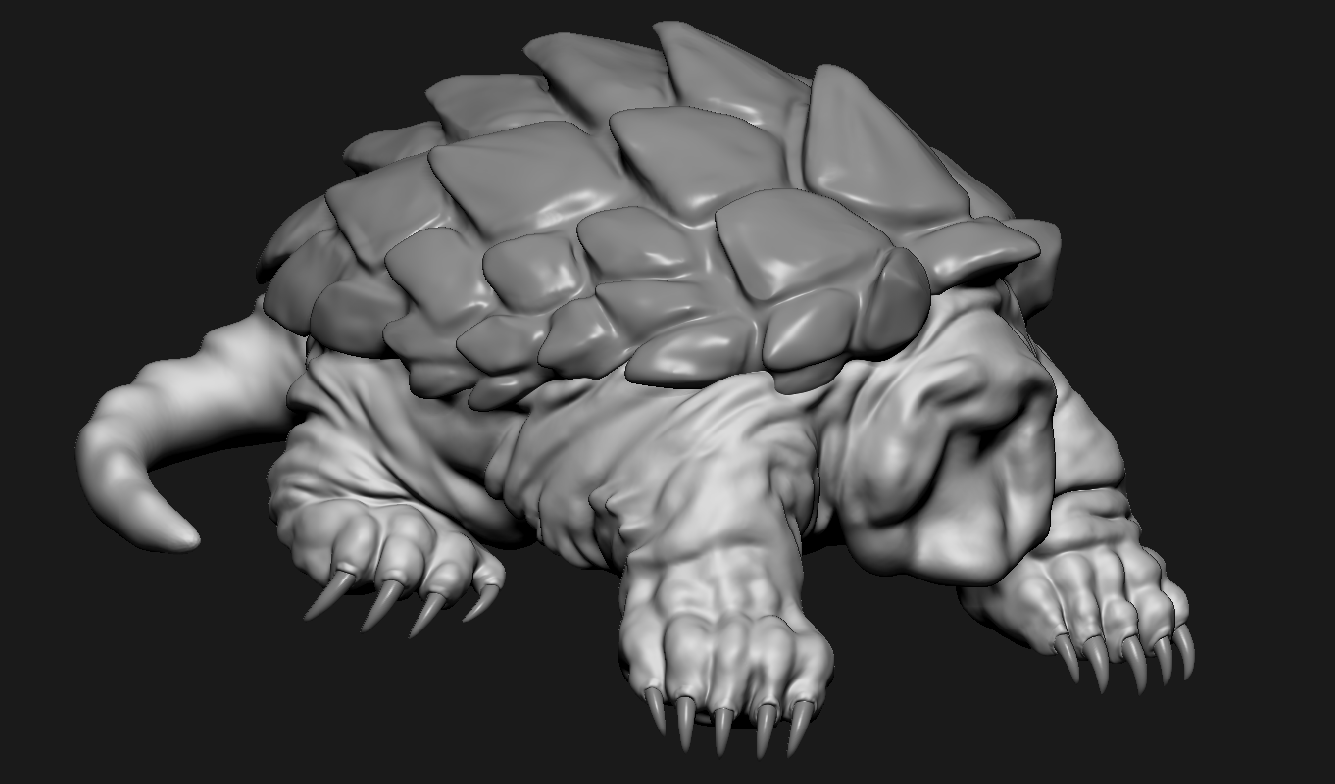
This sculpt was an early turning point in my practice of Zbrush. As for being my second 3D sculpt ever, I was able to begin to learn working in sections of a sculpt. For this sculpt, I began with Zspheres to set up the base of the body, but then I separated two different sections of the model to work on the shell and head apart from the body. This provided unique challenges that I was able to tackle in new ways. I became especially pleased with the sculpt of the turtle’s head, as it was the piece that allowed me to learn more practices in detailing.
Anatomy Sculpts
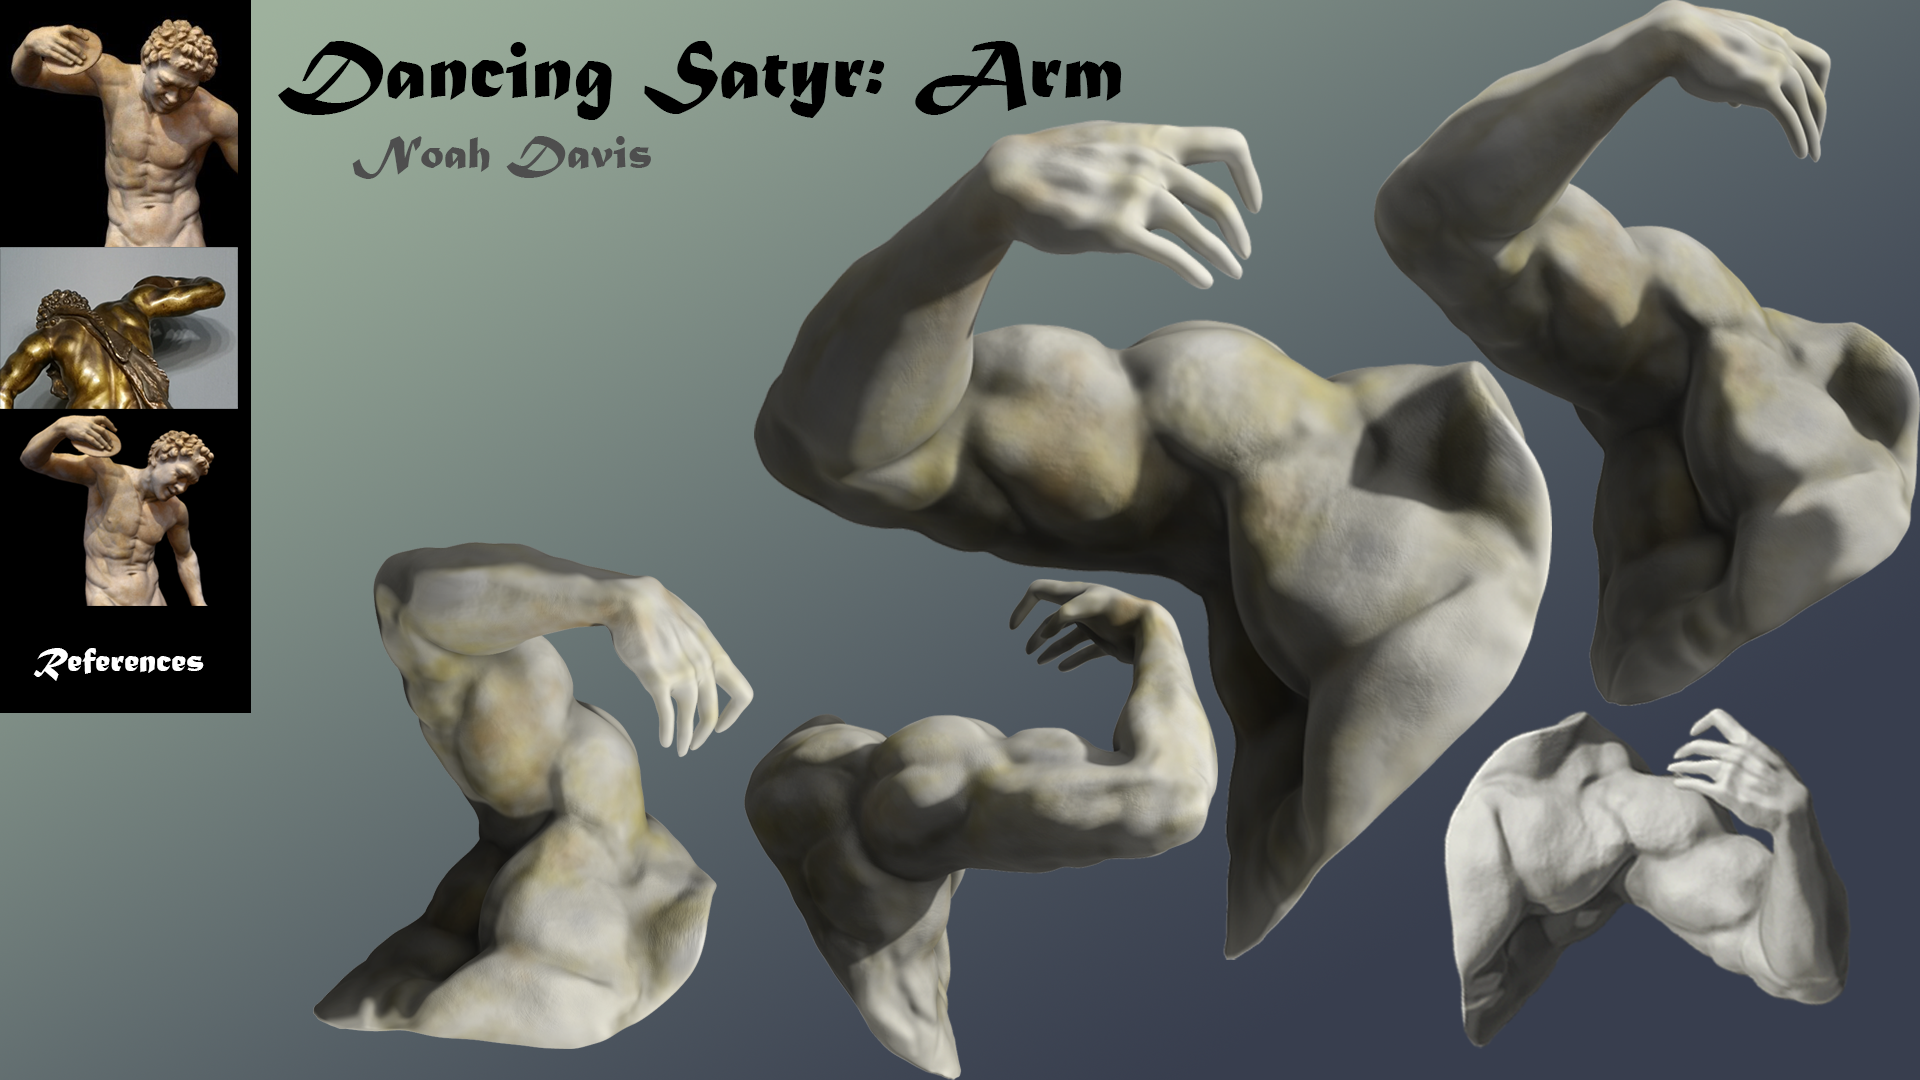
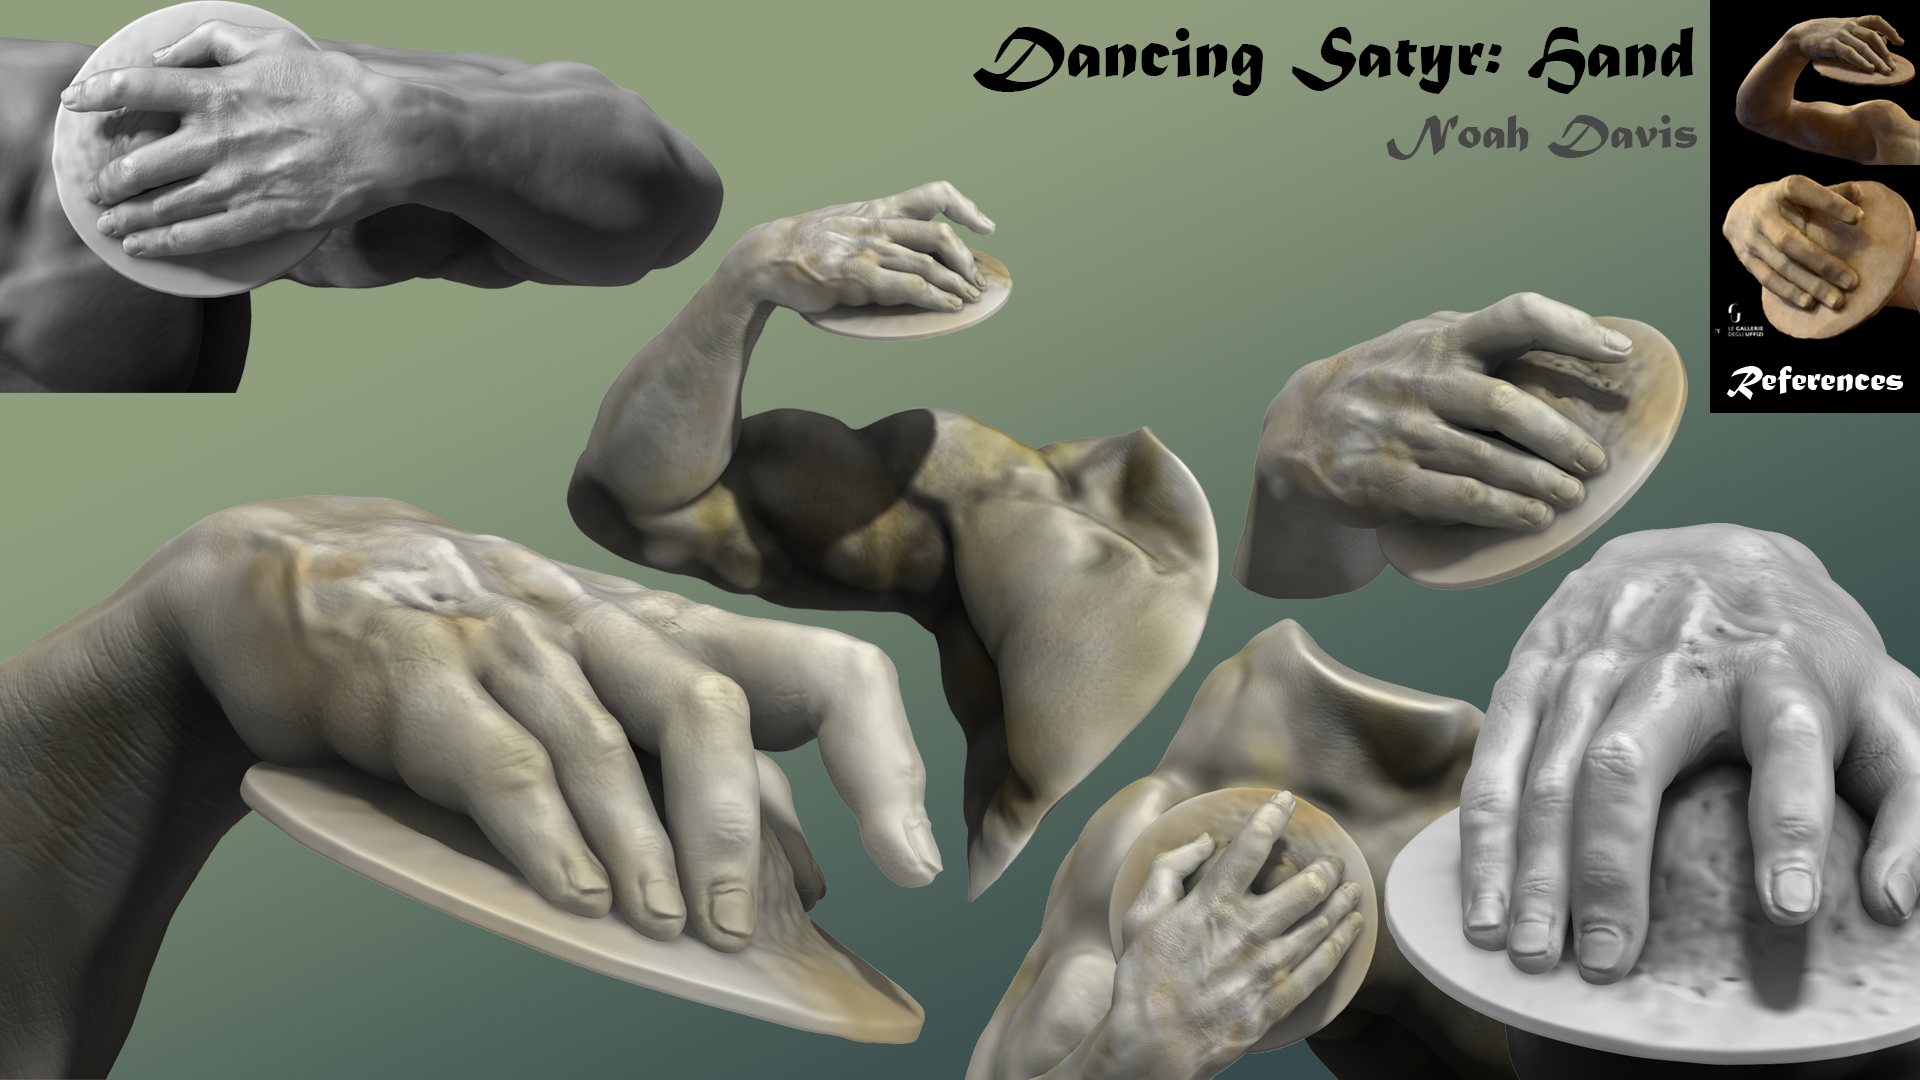
With these two sculpts, they mainly were able to act as stepping stones for practicing be anatomical understanding in creating 3D models. The below arm sculpt was referenced from the Dancing Satyr statue and was a practice in two waves. At first I focused on the arm detail and pose of the statue, while the my second run allowed me to finalize and fix the anatomy of the sculpture and uphaul the hand. This practice allowed me to grow to understand 3D modeling alot more, as it learn how to treat Zbrush as if I was working with art I was used to.
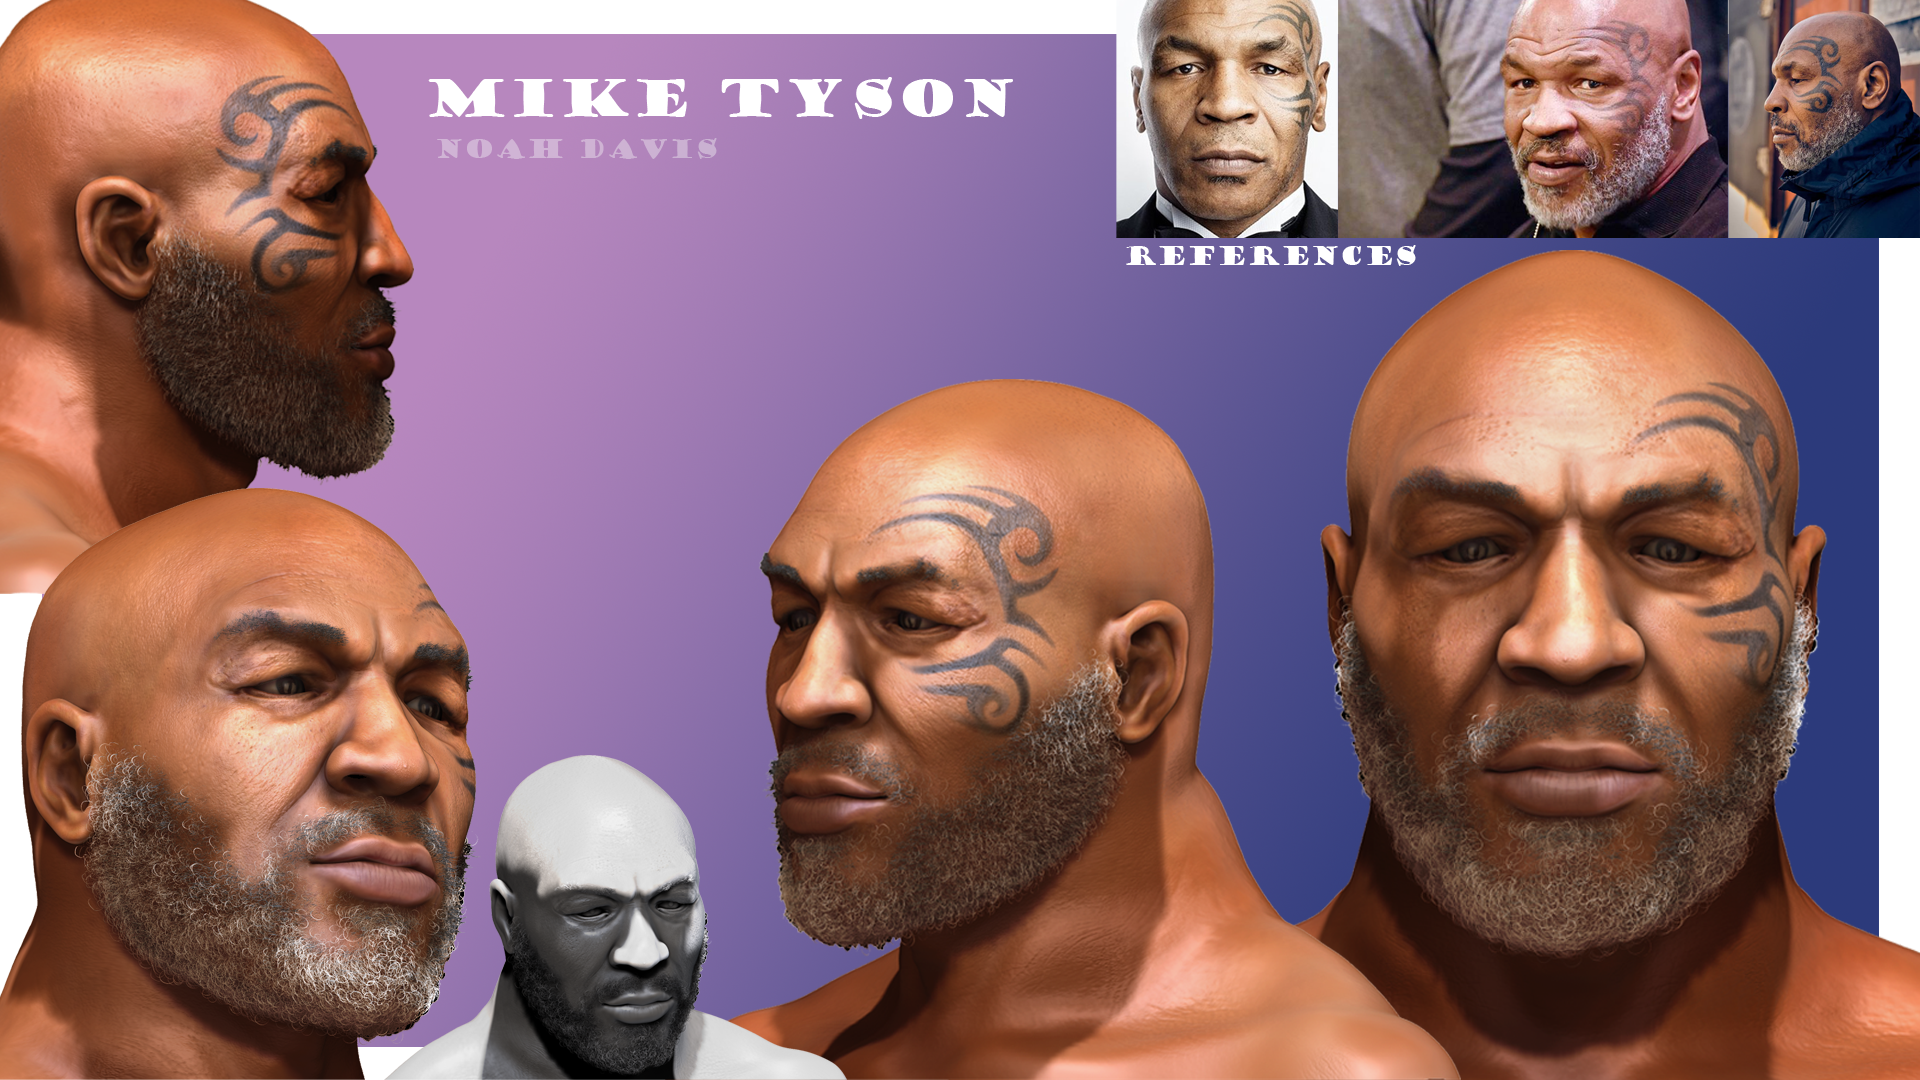
In my head sculpt of Mike Tyson to the left, it became my practice into nailing accuracy in detail and in painting a sculpture. This opened my eyes to Zbrush’s coloring tools beyond what I new before, allowing me to fine tune the desired details in order to create an accurate rendition. This sculpting further bolstered my skills in shaping models more, as you can see how I was able to fix the anatomy of the sculpture of Mike Tyson to appear more accurate.
First Version Second Version